Monday 2 April 2018
Thursday 17 April 2014
in the beggining...
at 17 i bought a 998 mini, fitted with a zeemax body kit, 13inch superlight alloys, it looked the part, but being 998 was lacking any kind of performance...

.... i know i know, oh dear

i always used to say i wanted to put a metro turbo engine into it, ....and thus the seed of the project was sown...

yep even had under lights, the stupid things you do when your young and cant have anything remotely fast, i remember paying £1400 a year to insure it at 17....now it costs £195 for the year.

i was forever ripping the front bumper of the zeemax kit off, on curbs, speed bumps and potholes, it was just fighting a loosing battle, the cracks always came back.
...a new front bumper and lots of filler after a crash involving an average curb...


the mini then sat in different garages for around 5 years before i brought it back home,

a couple more years went by with the mini sat gathering dust in the garage, until 1 day, i stumbled accross a glistening gem on ebay....

A reconditioned garret T3 turbo on metro/mini manifold... and an absolute bargain of an auction at £60....and this is really what started the project going, and got the ball into motion....only 7 years after dreaming
And So The Project Begins!!!!!
so research went into modifications to the mini to allow the turbo to fit, id heard a box similar to a weber bulkhead box had to be fitted to account for the turbo fouling on the bulk head.....and so

....this had to come out...

a couple of old seatbelts and a log puller/hand winch came in use

now this is the point i realised what id gotten myself into, i decided the 998cc unit had to go, and that a 1275cc unit over bored to 1293cc with dished pistons was the way to go... but on with that bulkhead modification, a hole was needed in the bulkhead ...
(The Bulkhead Box Turbo Mod)

so after a bit of grinding,

...

i was left with a nice hole in my bulkhead

the bulkhead box is available at minispares, but i got mine in a swap for a load of turbo bits, including a turbo hif44 carb, a plenum chamber, inlet and exhaust manifolds, an actuator and a spare t3 turbo which hopefully i wont be needing any time soon, the box was welded in, probably overkill but good to be sure its not going anywhere

(The Engine)
so on with the new engine, which again i got an absolute bargain, with an engine block removed from a metro turbo

included i got some +.020" omega 1015 pistons with a 10cc dish

so a +.020" over bore on this stroke makes for 1293cc

some balanced conrods

a lightened and balanced crank

a kent duplex timing chain
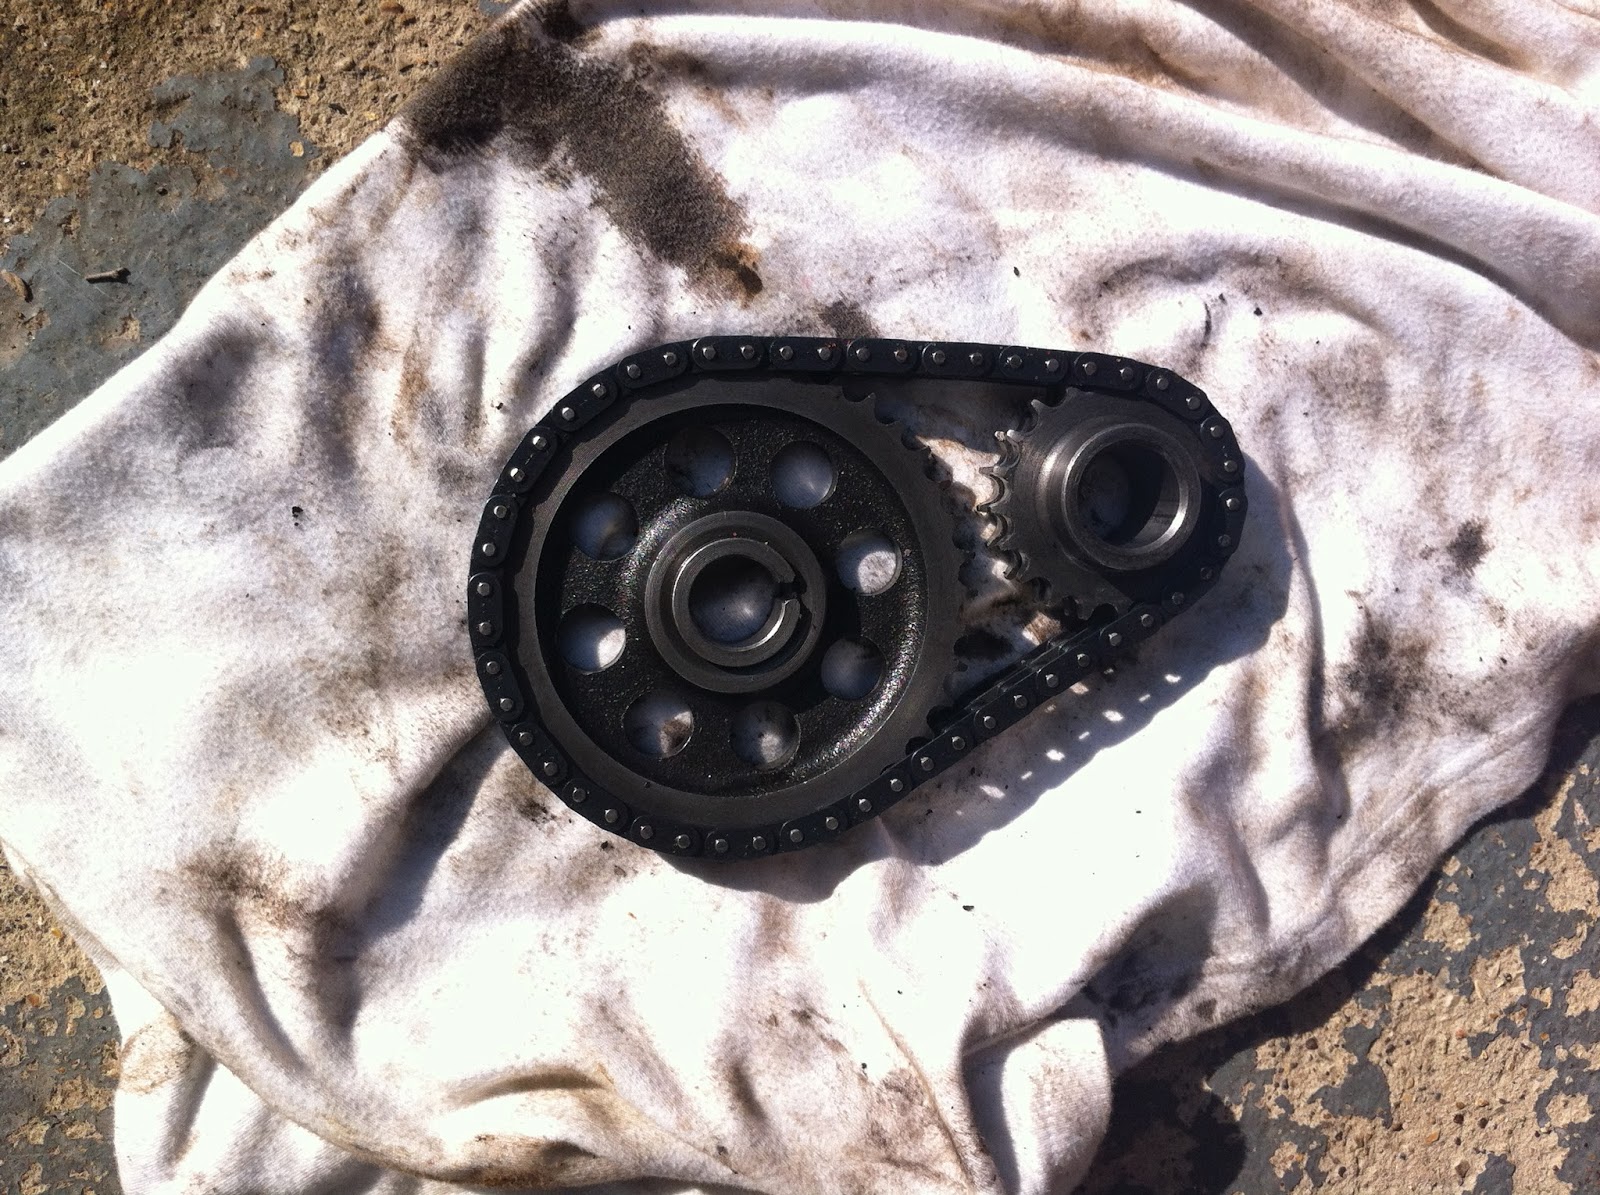
also i got a swiftune sw10 cam, which was not suitable for my turbo project, but the guys over at the Southam mini metro centre (smmc) swapped for an avonbar phase2 turbo cam, a grey race clutch, and a few other bits and bobs which i forgot to photograph, i won the lot on ebay all for £450 delivered :)
(Body & Weight)
at this point i got hold of some new doors, there was a patches of rust beginning to show at the bottom of the original doors, so i removed them and got hold of some carbon fibre doors which a friend was selling for £60.

and them fitted

i decided to switch to the less attractive black door handles, rather than the chrome ones which were fitted originally, there is a weight drop here of a couple grams, my guess is the chrome plating, possibly the black 1s were made of a different material which is lighter than the chrome 1s.

but after realising the weight difference between a carbon fibre door and a standard door, i was genuinly stunned, and thus began a new mission....the mini was to under go a diet..

so out came the grinder ...again...
(The Flip Front "Side plan")

this was just a case of grinding the spot welds at the tops of the wings and below the scuttle pannel. i then cut down the lip of the a panel on the wing side not the a panel side of the join, to leave a little extra material to play with.

until the front just dropped off, the inner wigs were then cut back to the level at the top where the main subframe bolts are fitted.

the front end was removed in one piece, with the front half of the body kit still all intact.


the snubnose look/ like a sorn off shotgun


the same friend i purchased the doors from was selling a 1 piece carbon fibre flip front for £80... i couldnt really say no.

i also decided next on my weight reducing mission was to remove the zeemax body kit which was fillered on and smoothed in all round, and afterwards a hefty weight removed

the next picture shows the new doors on, but the old steel boot lid still on

steel??? this is a heavy material! i got hold of a fibreglass boot for £15 and although its not perfectly scratch free, it is already in black :)

i then cleaned off the cack and sanded the bottem of the car to reveal much to my suprise a rust free underneath, the sills had been almost protected by the body kit, as the kits sills wrapped around under the car, fantastic! so just a fresh coat of paint was applied

the difference half way through

i decided to remove the bitumen from the interior floor, it was a thick tar, rubbery sealant used to to protect the floor from moisture but over time they work in reverse and hold the moisture in and rot the floor quicker, so it had to go

and the finished floor all shiney back to the metal

i collected all th bitumen into a carrier bag and it came to a 16kg of un needed weight, a quick lick of black paint to spruce the floor back up, not got a picture of the floor, but here is the rear seats after a coat of paint

i then trial fitted the carbon fibre front


she looked like a tongue out smiley :P

i then triangulated the front end with subframe brace bars to put some ridgidity back into the front end and stop the subframe from flapping about backwards and forth once the engine goes in

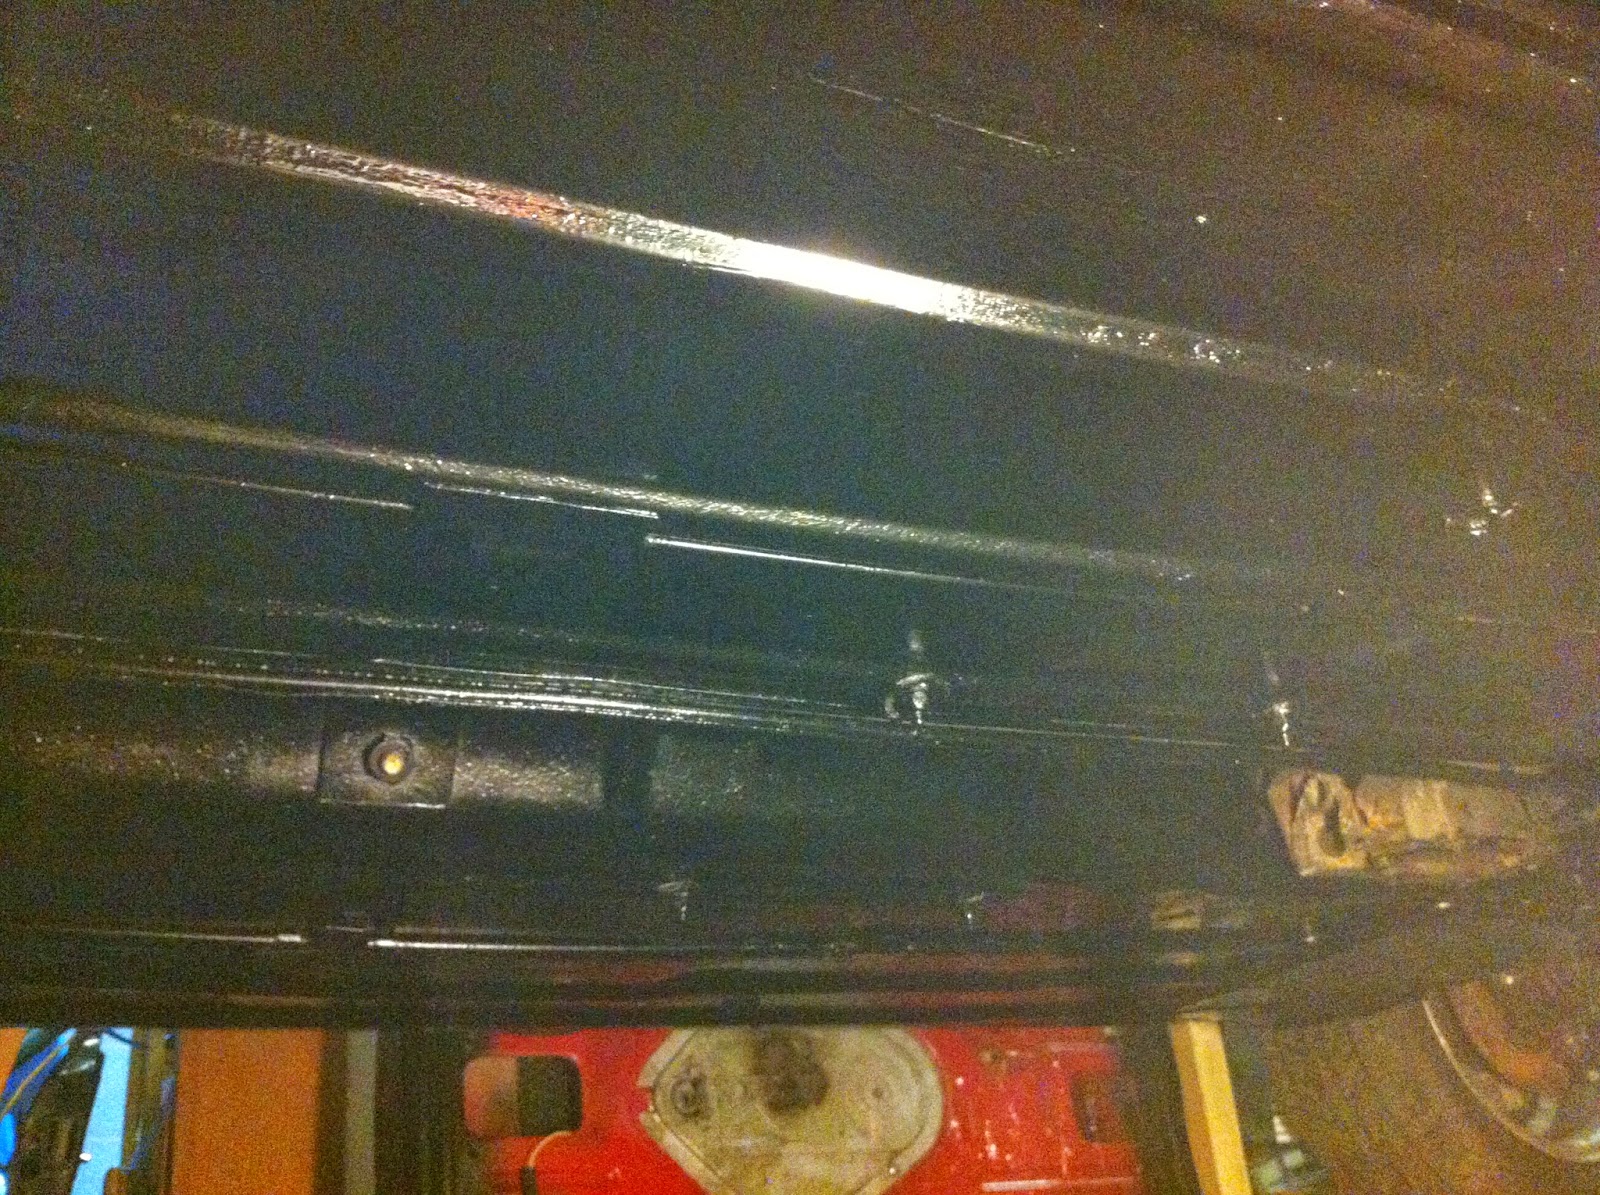
some dash mods....a fun day this was.

fitted my curley carbon fibre dash, chopped the centre pod that went down to the floor away, as i didnt like the way it looked, its done for now but a few more dials will need to go in for boost pressure gauge

i decided to do away with the whole dizy and coil "getup" and purchased a megajolt lite jr programable ignition ecu, this was fitted in the car to the dash


i had the engine block bored out, then built and timed at southam mini metro centre, https://www.facebook.com/pages/Southam-Mini-Metro-CentreSMMC/309610772386228
southam were very helpful and very reasonably priced there a really friendly bunch of guys that really know their stuff, iv used them a few times for different problems with other minis, and they've always provided a spot on service, i highly recommend them to anybody.
here id just bolted it onto the gearbox

next it was fitted into the car

i then began to build up some more of the engine bay

and build up the front end now i knew it fitted, here it has the lights back in, and a carbon fibre panel was used to cover the hole my friend had previously cut to fit a front mounted fan


and the grille


i fastened the front to the a panls with dzus fasteners, using carbon fibre srips to protect the front ends pant from being chipped

i then purchased some carbon fibre exposed weave miglia style arches


exteriorwise, this is how shes looking so far, plans for paint etc will come later, now iv decided just to get her fired up so the orange and black will stay ....for now

(The Cylinder Head)
i managed to find a metro turbo cylinder head on ebay, £60 :)


I then got in touch with "Turbo Phil" from turbo-mini.com who did a fantastic job with the work that he did to my cylinder head, its because of speaking with him and the usefullness his website, that i have been able to do as much of this project. also he totally transformed my cylinder head...

its like a brand new head now but with so much metal removed, the beaks are completly gone and smoothed out, the compression ratio has been lowered by enlarging the combustion chambers to allow for 18-20 psi boosts :) new larger rimflow valves and brass guides were fitted and double valve springs, here it is back from phil, and fitted


i went for the uprated pushrods from mini sport

after fitting the rockers and the head was about set up i decided to fit the manifold, turbo and inlet with the hif44 turbo carb and standard plenum....

(the turbo and manifold in this picture are the 1s i took in as part of a swap, not the nice new-like reconditioned 1 which i am using
i was excited and wanted to see what it looked like :) so fitted the standard steel rocker cover.


(Cooling)
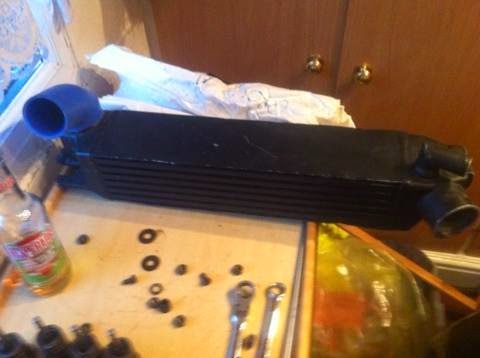
the intercooler...
its a sierra saphire cosworth 2wd intercooler due to it having larger air chambers internally and is supposedly more efficient for cooling than most larger aftermarket intercoolers which are cheaply produced, also it was a nice size, and i bought it off a friend that had it on a mini, the blue hose on the top was included as it was the only one my friend could find that managed to fit under the curve of the mini front.
so next i had to make a bracket which would allow the ford mounting points, and a frame to hold it in to position.. so next i had a trial and error phase with what i had laying around, just to guage the amount of room i was working with...so the first efforts were for positioning purposes...

this showed me where about the intercooler needed to be, now a more permanent bracket was needed

also in the last 2 photos you can also see a small cooler, this is a second radiator which i plan to fit for extra water cooling if the engine gets hot, this is plumbed into the original heater feeds, so by having the heater switched to cold (stalk pulled out on this), the second radiator is closed and allows the engine to warm up quicker, good for first starting i figure, then when the cars up to temperature, or getting hot, turn the heating on (push the stalk in on this) it opens the valve to the second rad and the engine gets extra cooling, more concentrated on the head judging by where the water feeds are

the new bracket and the secondary radiator fixed on, i started with a random disgusting length of angled steel, cleaned it all up "shiny new" with an angle grinder, and chopped and welded a section on the end, drilled it to suit so that all 4 bolt holes on the intecooler bolt to it, this then fixes to a square frame, which is then bolted to the front subframe.


i then got hold of an oil cooler, and managed to squeeze it into the "cooling frame"

in the top right of the picture you can also see the ford edis4 ignition unit, on a trial bracket mounted to the bulkhead.
(The Plenum Chamber Inlet Mod)
next was to modify the plenum chambers inlet, this was for 2 reasons, firstly to allow for the intercooler to be connected, as the standard feed is directly to the turbos outlet pipe and is litterally not possible to connect an intercooler without modifications, and secondly to blank of the awful standard "dumpvalve" which is on the plenum, (its basically a spring with a bung on the end). so after some cardboard templates and a bit of grinding and welding i made this.

there is a curved 50mm steel pipe which happens to snuggly curve around the carbs dashpot, but with out actually touching it a better view of the edis4 on the right, and central is the pipe coming up from the turbo, a series of silicone hoses will connect these 2 pipes to either end of the intercooler

the black line on the plenum feed is where it will be chopped off

i managed to salvage a coil pack which was suited to my megajolt ecu install off a friends car which was making a trip to the scrap yard along with the ht leads and spark plugs. also a new rocker cover and T bars were fitted.

i fabricated a bracket to hold it in place, i love how tight the whole install of the coil pack, plugs and leads are in the front.


(The Fuel Lines)
i managed to acquire some 8mm and some 10mm copper pipe from a plumbing mate,
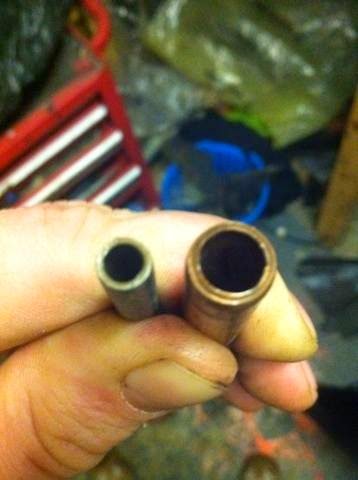
on the left is the 6mm standard fuel line compared to the new 10mm fuel line on the right.

next was to get it fitted, i used 10mm copper pipe for the fuel feed and 8mm copper pipe for the return

using a spring pipe bender i managed to follow the line for the original fuel line, i used the original metal clamps to hold the new lines in place, then secured the 2 lines together with a few cable ties, to stop any vibration or movement.

the fuel lines were then bent to follow the bulkead up to the top of the engine bay, they still need to be chopped off shorter and braided lines fitted, but this is how they sit at the top so far longer than they will be, with a braided rubber fuel line (just to get the feel of where things will be going), also the plenum pipe has been chopped and first coated

i needed to cut some holes in the front above the grill level to allow air to pass through the intercooler, so...

i used a 75mm hole cutter, and measured the center points of the pilot holes 100mm apart, dropping 5mm each time i moved out, so the holes follow the gentle curve of the center section of the grill


TURBO OIL FEED AND RETURN
finally got round to ordering the oil feed and return pipes for the turbo, also purchased the oil return plate for fixing to the engine.

the fixings are anodised aluminium and managed to chip the paint off just mentioning the word spanner, but all fitted with oil pressure switch back in, this t piece screws into where the oil pressure switch is fitted, the oil pressure switch is then screwed into the top of the new fitting.

this then loops around the clutch housing ( wok) and back in to the top of the turbo.

(its just the stainless steel braided hose coming from under the coil pack on the left of the picture, looping around to under the inlet manifold on the right of the picture)

the pipe has a banjo bolt fixing on the turbo side, ... dont forget the copper washers!
the return pipe was a bit of a pig, i ended up having to take the oil feed back off, remove the carb and inlet manifold, the exhaust manifold, with the turbo just to get the return plate and return pipe on

but finally after some serious finger cramp and stratched knuckles, i managed to get the return all hooked up the return uses the original mechanical fuel pump hole, with a specially adapted plate which the oil is then fed back to the engine through.

the below shot which is the only angle i could get in to tighten it all up from.
REAR SUBFRAME
next i decided to change the rear subframe, as the 1 that was in was a bit corroded, and generally scabby and rank, this is showing the "orange" old subrame just removed.

a nice shiney new rear frame all built up ready to go in with high lows and spax dampers.

getting it into place

the subframe is a "for now job" in time the plan is to remove all this guff and replace with a nice lightweight rear beam axle and coilovers.
THE "REAR LIP" (rear valence seam removal)
after removing the body kit, the only rust to speak of was on the rear valence on the lip its self, visible in lots of the pictures so far....an eye sore which needed to be dealt with....so out with the grinder again :(
Subscribe to:
Posts (Atom)